Pre-requisites
This section is the final installment of the topic Arduino Web Projects: Beginner to Advanced. It provides a description and overview of the advanced web projects for the Arduino platform.
- Previous section: Intermediate Web Projects for Arduino
The projects presented in this article require two Arduino boards. One hosts the web server, and the other hosts the main application. A separate Arduino project is uploaded to each board. The boards must then be connected to each other using their serial pins. TX of each board is connected to the RX of the other. The GND pin of one board should also be connected to the GND of the other. Be sure to disconnect the wires to the serial pins when uploading the projects.
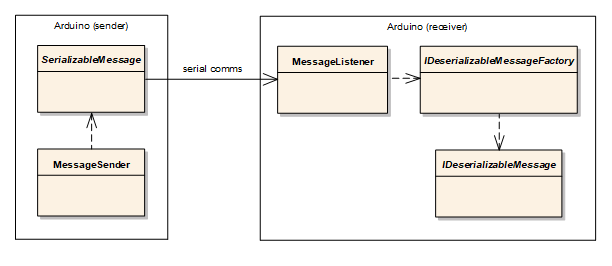
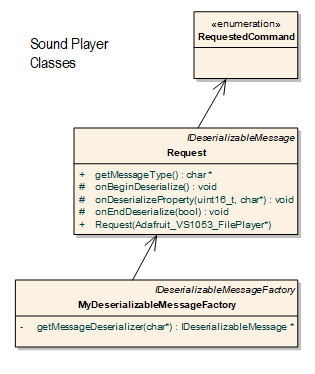
A serial based messaging protocol is used to handle the communication between the two Arduino boards. It is modelled on the concept of serialization and deserialization, as found in frameworks such as .NET. The messaging protocol is covered in a dedicated chapter in the book Arduino Web Development: Pushing the Limits.
If deploying the web project to an Arduino board with WLAN capabilities, it may be necessary to identify its network IP address by logging in to the networking router and finding it there.
Use the links below to download the projects source code and framework libraries. Please review readme files and comments in the code to ensure additional libraries are installed.
All the source code can be built and deployed using the latest Arduino IDE. A more productive Arduino web development environment can be attained by using the freely available Visual Studio Code (VS Code). Using the MVC view generation utility, VS Code can build and deploy Arduino web projects that have Arduino Server Pages.
Project 5: Sound Effects Panel Web UI
Be sure to review the pre-requisites before building this project. The Sound Effects Panel web project presents a web UI to the user with which to play recorded MP3 sounds stored on an SD card. A VS1053 based MP3 shield is required for the Arduino to which the SoundPlayer project is deployed. MP3 sounds are stored in a Sounds folder of the SD card. The Arduino web project SoundEffectUI must be deployed to a separate Arduino board that has networking capabilities, such as an Uno with ethernet or an ESP8266 based Wemos D1 mini.
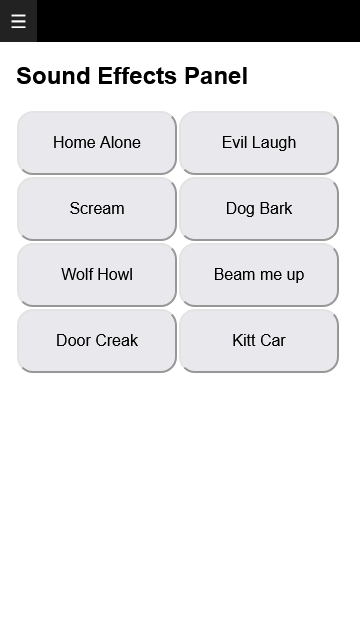
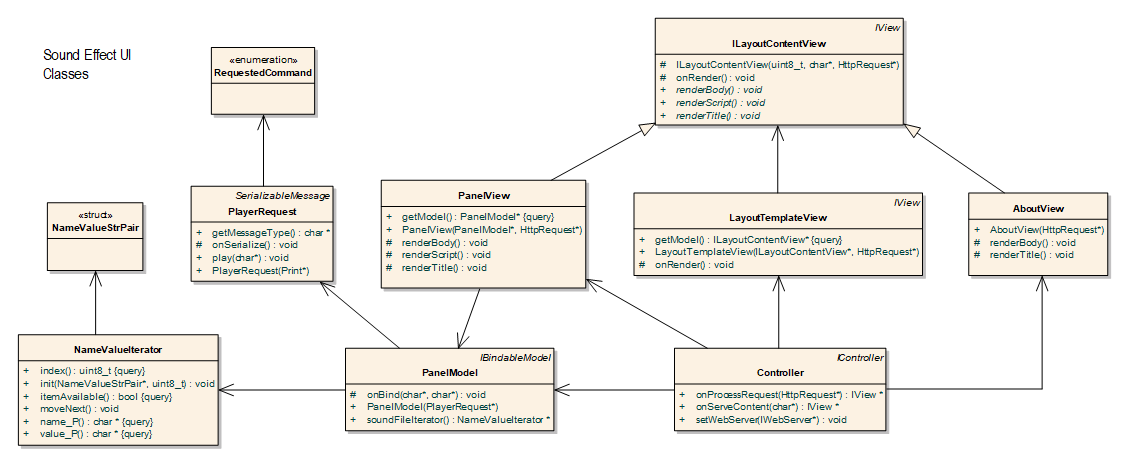
The file PanelModel.h of the web project contains the file names and descriptions of the sounds that are played when a button is clicked or pressed in the UI. The class PanelModel exposes a means of iterating the list of sounds for display, and implements model binding to identify which HTML button was pressed. A request is then made via serial to the other Arduino board to play the actual sound.
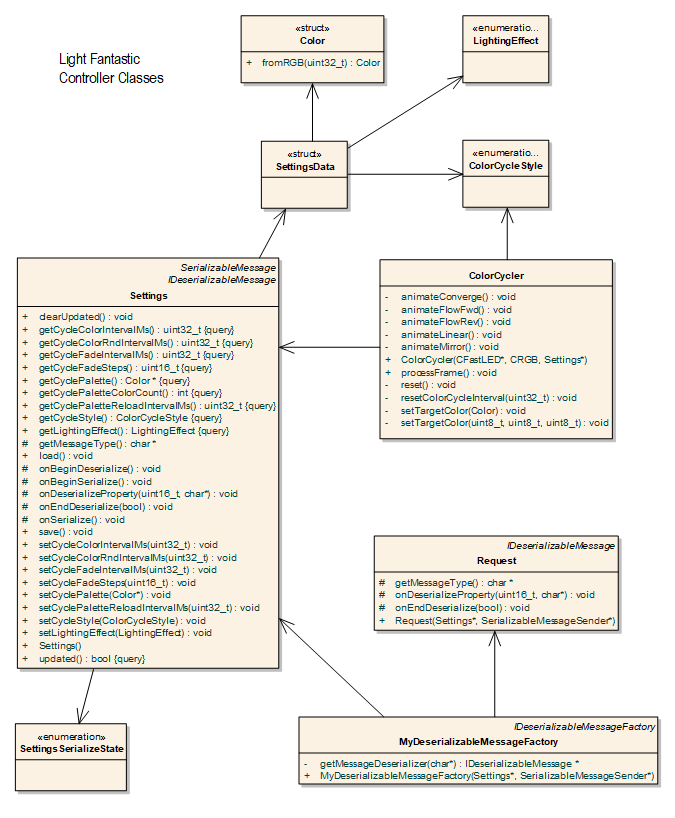
Project 6: LED Effects Web UI
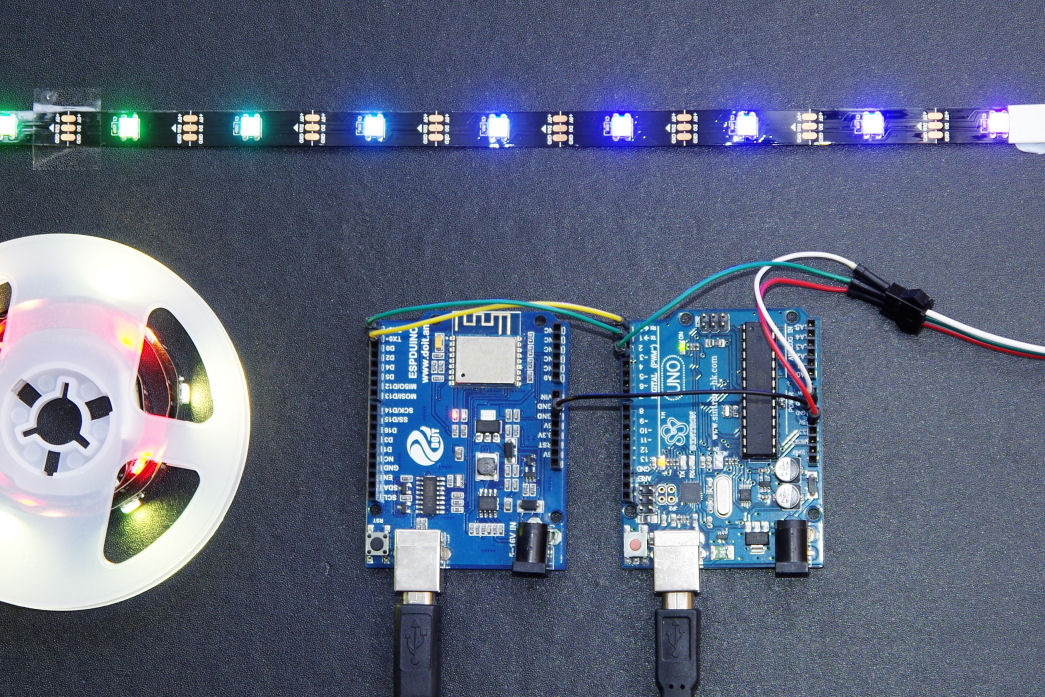
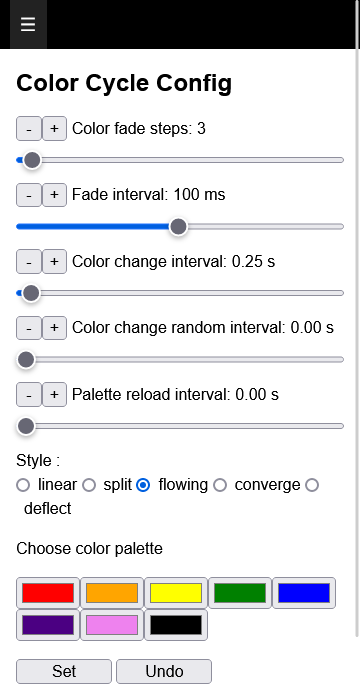
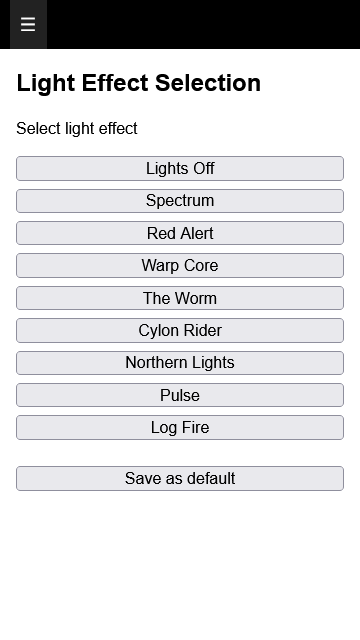
Be sure to review the pre-requisites before building this project. The LED Effects (Light Fantastic) web project is the most complex of the six Arduino web projects. It provides a web UI to define a lighting pattern for a strip of addressable RGB LEDs. The web UI is hosted on a network capable Arduino board, and the RGB LEDs are controlled by a separate Arduino board.
Some features of the web UI are omitted when deployed to an Arduino Uno, because of insufficient memory. Deploying to a board with more memory (e.g. Mega 2560 or Wemos D1 mini) will enable all features. Remember to connect the serial pins of the Arduinos after the source code has been deployed to them.
Review the Arduino project file LightFantastic_Controller.ino to configure the FastLED class, the number of LEDs and the data pin. To add or change lighting effects, review the file LightEffectView.asp in the web project. There you can also see how lighting effects can be controlled using a web API.
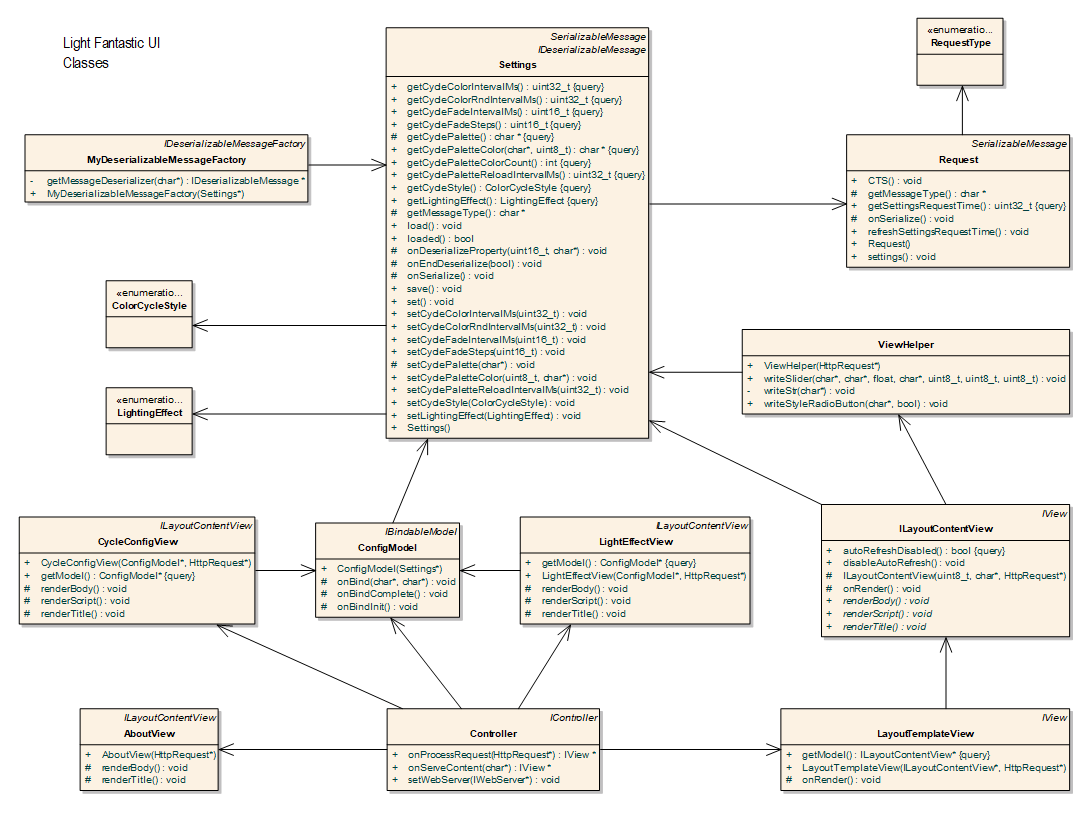
The Light Fantastic project is also featured in the book Arduino Web Development: Pushing the Limits, where its workings are explored in much greater detail.
Final Thoughts and a Challenge
After having examined, adapted and deployed the beginner, intermediate and advanced web projects in this series, the reader will have learned how the MVC Web Framework for Arduino can extend the scope and types of applications that can be built for the Arduino platform. A reader seeking a challenge could try to add a web page to the Light Fantastic project that configures the number of LEDs and overall LED brightness.
If you’re looking to explore further the possibilities of developing web projects for the Arduino platform, please buy the book Arduino Web Development: Pushing the Limits. The coding examples and coding exercises that accompany the book will help build the skills needed to be able to build a range Arduino web applications.