Pre-requisites
This section is the next installment of the topic Arduino Web Projects: Beginner to Advanced. It provides a description and overview of the intermediate web projects for the Arduino platform.
- Previous section: Beginner Web Projects for Arduino
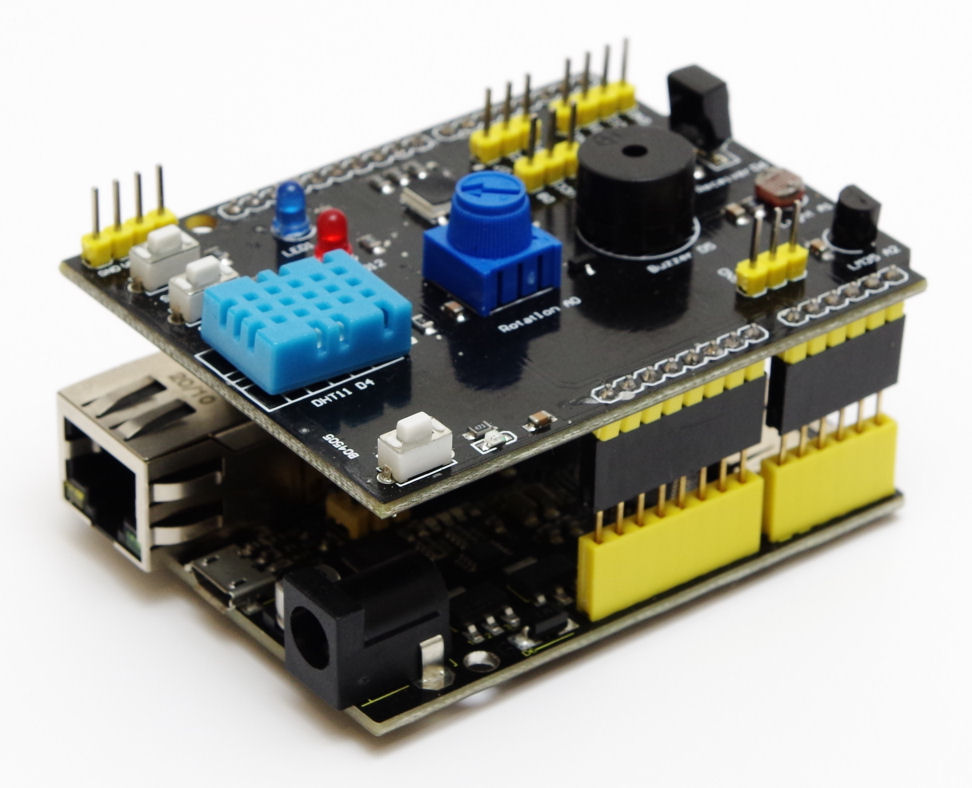
The projects presented here have been tested to work with an Arduino Uno R3 and ethernet shield (or equivalent). The image above illustrates how the projects can use a 9 in 1 sensor shield and a Keyestudio w5500 board. Stacking headers are used to raise the shield above the ethernet connector. Also required are separate LEDs as those on the 9 in 1 shield share the Uno SPI pins. The PIR motion detector project also requires a PIR sensor.
Use the links below to download the projects source code and framework libraries. Please review readme files and comments in the code to ensure additional libraries are installed.
All the source code can be built and deployed using the latest Arduino IDE. A more productive Arduino web development environment can be attained by using the freely available Visual Studio Code (VS Code). Using the MVC view generation utility, VS Code can build and deploy Arduino web projects that have Arduino Server Pages.
Project 3: PIR Motion Detector Floodlight Web UI
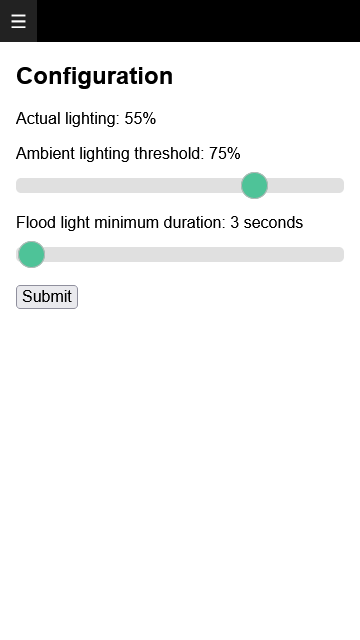
Be sure to review the pre-requisites before building this project. The PIR Motion Detector web project simulates a PIR floodlight. It requires a photo resistor connected to Arduino pin A1, a PIR motion sensor connected to pin 7, and an LED connected to pin 8. The project allows the user to configure the ambient light threshold and LED duration when motion is detected. If the PIR sensor already has a dial for setting duration, please set it to minimum.
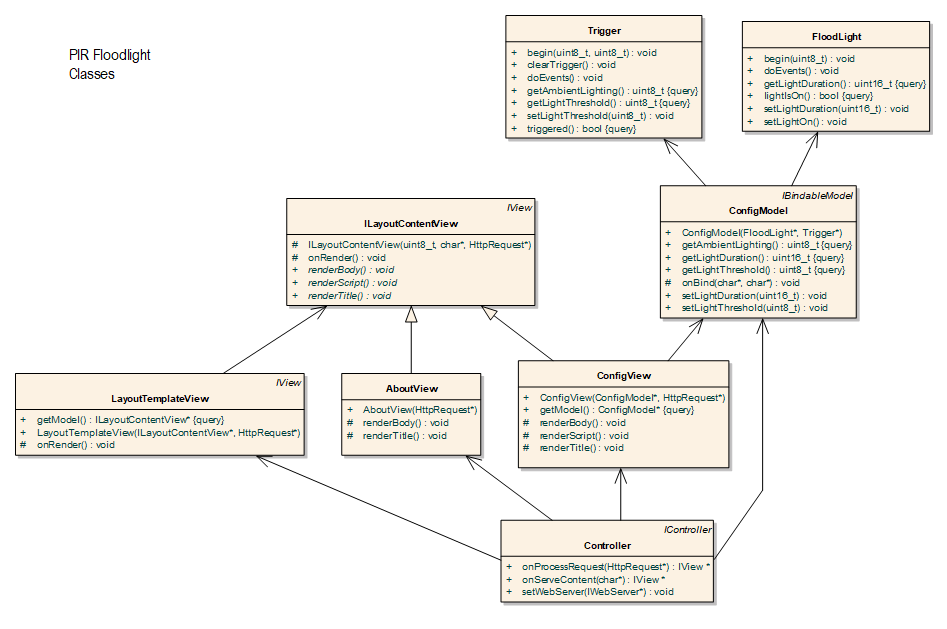
The Trigger class in the source code continuously monitors the ambient light and the PIR sensor. In the main loop of the application, once the trigger has been activated, the LED is switched on for the configured duration. Class ConfigModel has references to instances of classes Trigger and FloodLight, and is used by ConfigView to enable user configuration. The Controller class implements request filtering, and returns a view for rendering to the browser. This is typical with most MVC web projects.
This project introduces model binding (in class ConfigModel) for capturing HTML form values submitted using HTTP POST. Handling HTTP POST data is covered in greater detail in the book Arduino Web Development: Pushing the Limits.
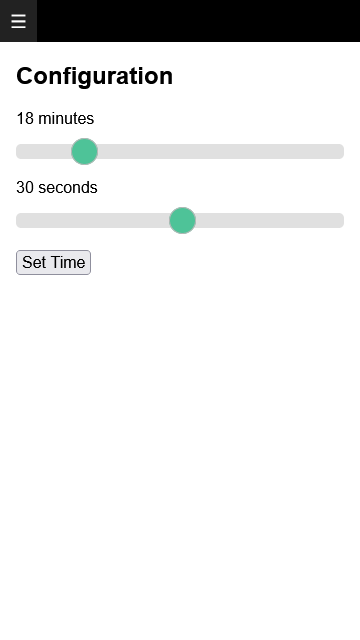
Project 4: Countdown Timer Web UI
Be sure to review the pre-requisites before building this project. The Countdown Timer web project allows the user to use a web UI to set the countdown duration, and start, stop and reset the timer. It project requires an active buzzer connected to Arduino pin 5, two LEDs (one connected to pin 7, the other to pin 8), and two buttons (one connected to pin 2, the other connected to pin 3).
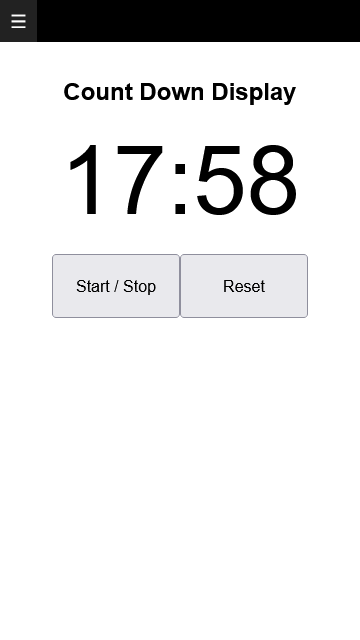
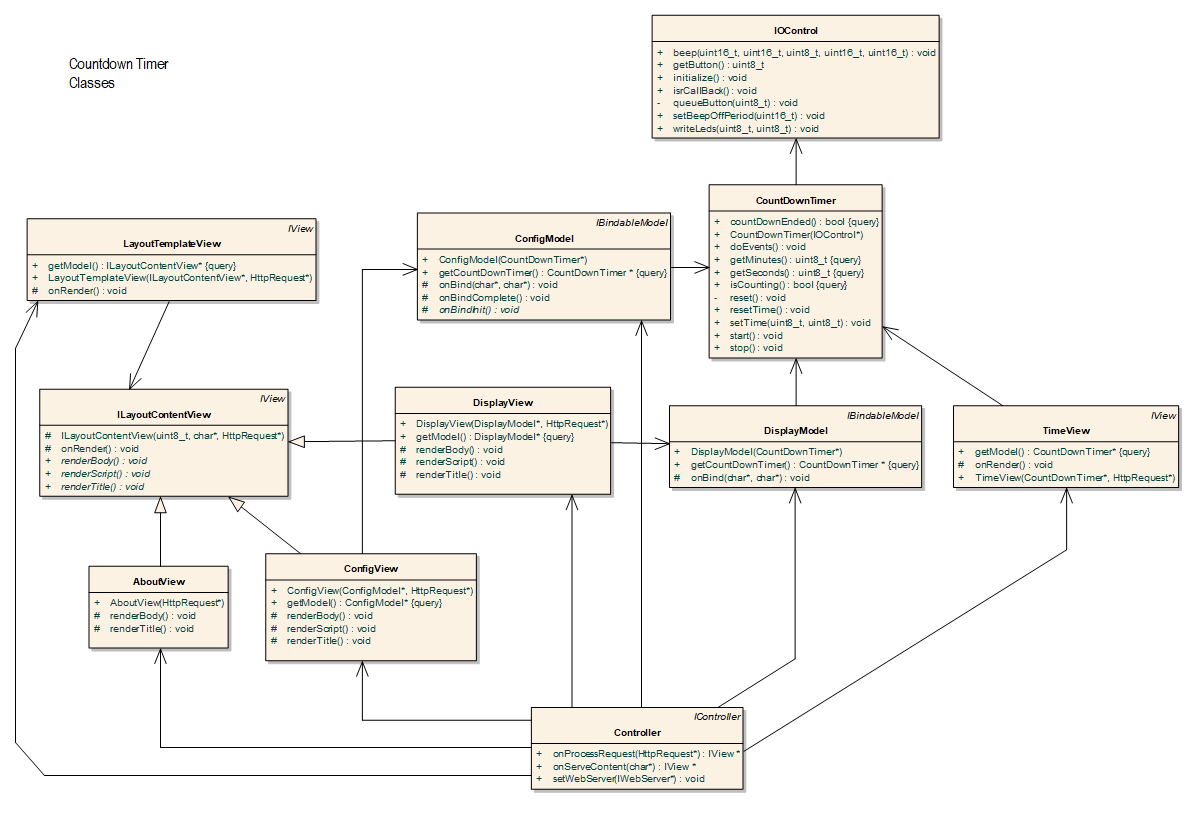
In the source code, the class IOControl implements hardware abstraction for interacting with the above components. Class CountDownTimer implements the logic of the timer, and is referenced by both the DisplayModel and ConfigModel classes. Class ConfigView implements the UI for configering the timer, and class DisplayView implements the UI for displaying the remaining countdown time. The TimeView Class renders the remaining time using plain text format for AJAX requests made by the browser Fetch API. AJAX and model binding techniques used in the previous projects are used here also.
The buttons can also be used to start, stop and reset the timer. When the countdown time has been reached, the alarm sounds. Because of networking latency, the remaining time displayed will be slightly behind the actual remaining time, and may not appear to update in a consistent manner. The actual accuracy of the timer is unaffected.
- Next section: Advanced Web Projects for Arduino