Pre-requisites
This section is the first installment of the topic Arduino Web Projects: Beginner to Advanced. It provides a description and overview of the beginner web projects for the Arduino platform.
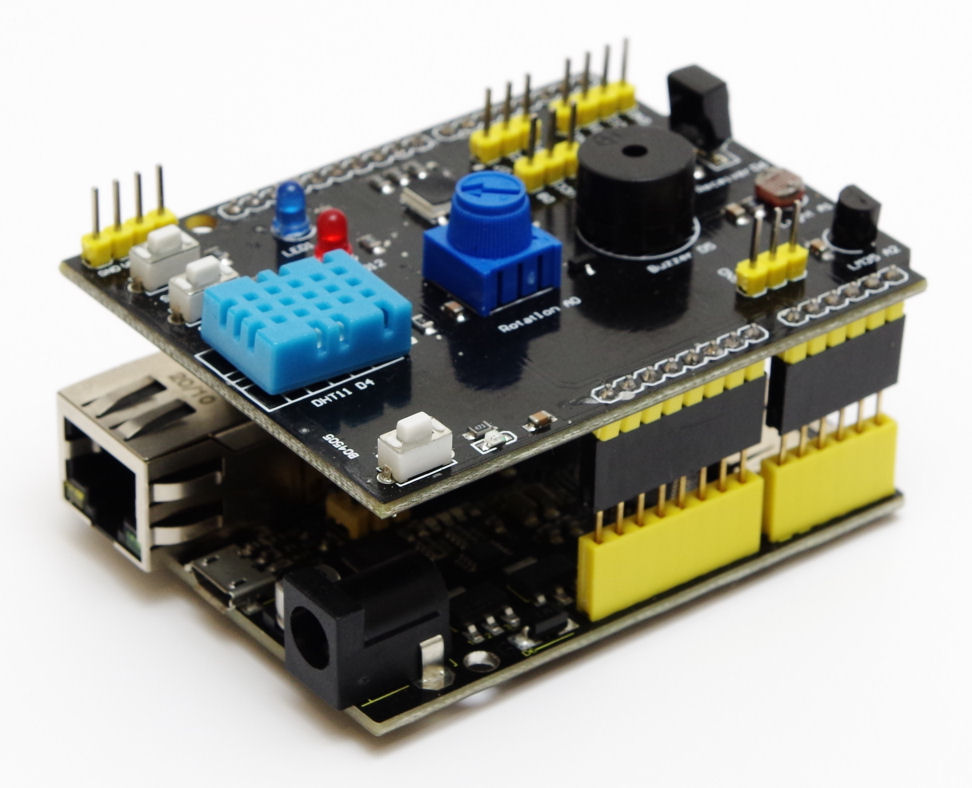
The projects presented here have been tested to work with an Arduino Uno R3 and ethernet shield (or equivalent). The image above illustrates how the projects can use a 9 in 1 sensor shield with a Keyestudio w5500 board. Stacking headers are used to raise the shield above the ethernet connector.
Use the links below to download the projects source code and framework libraries. Please review readme files and comments in the code to ensure additional libraries are installed.
All the source code can be built and deployed using the latest Arduino IDE. A more productive Arduino web development environment can be attained by using the freely available Visual Studio Code (VS Code). Using the MVC view generation utility, VS Code can build and deploy Arduino web projects that have Arduino Server Pages.
Project 1: Sensor Web API
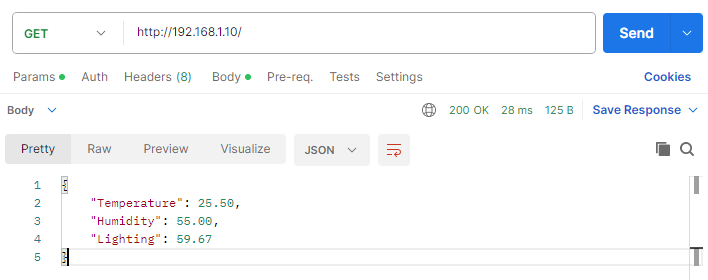
Be sure to review the pre-requisites before building this project. The Sensor API project implements a web API for retrieving sensor values. It requires a photo resistor connected to Arduino pin A1, and a digital humidity and temperature (DHT) sensor connected to Arduino pin 4. It also requires the Adafruit DHT library to be installed using the Arduino IDE. Review the project (.ino) file to ensure the MAC and IP addresses are set to work for your network environment. When the project has been uploaded/deployed, navigating to the Arduino’s IP address using a browser will retrieve sensor readings in JSON format.
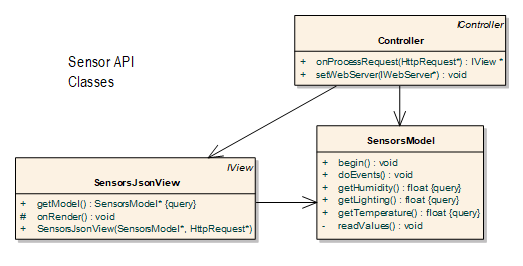
In the source code, the SensorsModel class has methods for retrieving sensor values at a fixed interval. The class SensorsJsonView (generated from SensorsJsonView.asp) uses a SensorsModel instance to render the sensor readings in JSON format. In all the projects the Controller class implements request filtering, and instantiates and returns a view for rendering to the browser. In this case, SensorsJsonView.
The Controller class implements request filtering, and instantiates and returns SensorsJsonView for rendering to the browser.
Consider buying the the book Arduino Web Development: Pushing the Limits, as it covers the topic of Web APIs in greater detail.
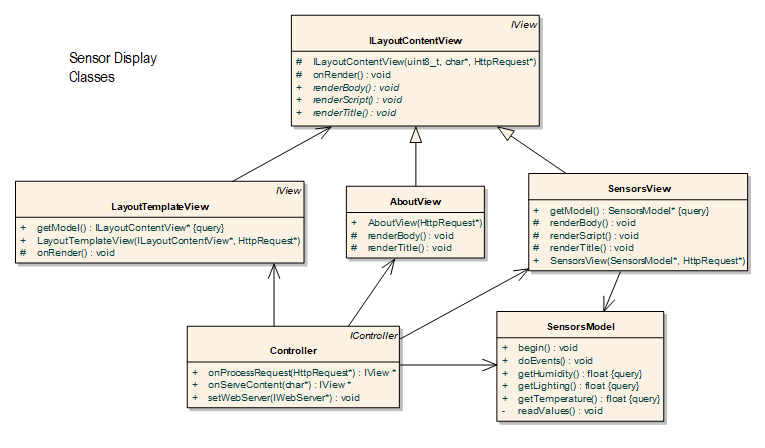
Project 2: Sensor Web Display
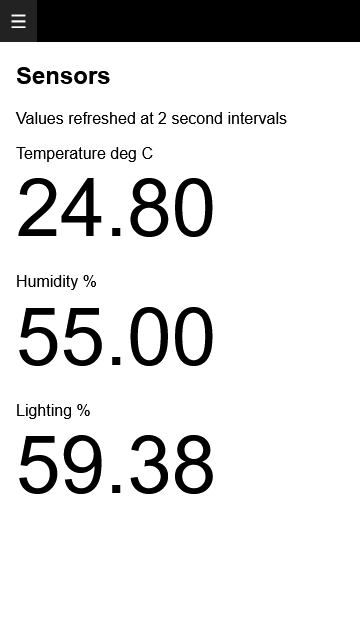
Be sure to review the pre-requisites before building this project. The Sensor Display project is a variation of the Sensor API project above, but instead of rendering sensor readings in JSON format, the readings are rendered as a HTML web page. The page is automatically refreshed every two seconds using the browser Fetch API. This project introduces layout templates for the consistent formatting and rendering of HTML pages.
Layout templates define the structure of HTML pages, and identify place holders for injecting dynamic content. This approach also works well as a way of implementing AJAX. By only partially rendering an HTML web page at the server, the browser Fetch API can be used to inject the partially rendered content in to the HTML document.
The topics concerning layout templates and AJAX are covered in the book Arduino Web Development: Pushing the Limits.
- Next section: Intermediate Web Projects for Arduino