
This automated gearbox project illustrates a Python-based implementation of an automated two-speed gearbox control system. It utilizes a servo motor for gear selection and an infrared (IR) sensor to measure the rotational speed of the drive shaft. The system is designed to respond to commands from an IR remote controller allowing for motor speed and torque adjustments.
Programming an automated gearbox transmission using Python and our Robo-Tx library teaches a variety of technical skills. For instance, concepts in engineering, software development, and systems design. This code serves as a foundational example of the possibilities of Python in LEGO robotics. To find out more about the Robo-Tx framework, visit Python for Robotics Simplified.
Arduino Components and LEGO Technic Parts
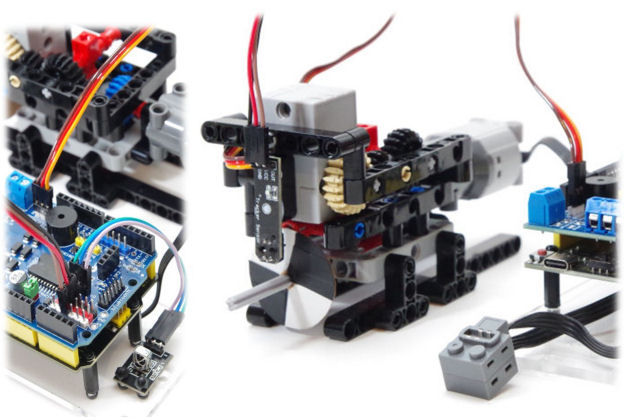
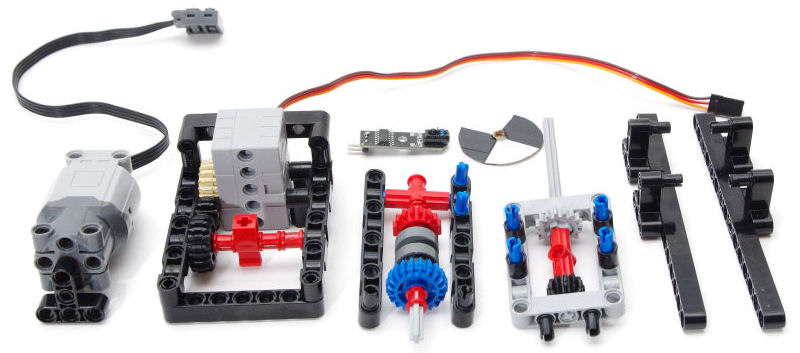
The LEGO parts to build this gearbox can be obtained from online stores using the part numbers listed below. Also required is an Arduino Uno, a robotics motor expansion board, a GeekServo motor and LEGO motor, an IR line or proximity sensor (connected to Arduino pin A2), an IR remote sensor and NEC compatible IR remote control. A simple encoder wheel will need to be improvised (using stiff card) having a diameter of 35mm. Use a dedicated 9V DC power supply with a barrel connector for the Arduino.
- Clutch parts: 18946, 18947, 35185, 18948, 6641
- Beams: GDS-1593 (x4), 32524 (x2), 41239 (x2), 60484 (x4), 18654 (x4), 64179, 32523
- Connectors: 32013 (x4), 32034 (x2)
- Pins: 4274 (x2), 2780 (x24), 43093 (x6), 6558 (x4)
- Axles: 4519 (x2), 32073 (x2), 44294, 60485, 3749
- Bushings: 6590 (x6)
- Gears: 32269 (x2), 32270 (x2), 94925
The servo and IR remote sensor have dedicated pins on the robotics motor expansion board. A LEGO motor extension cable can be cut in half to make an adapter cable for the LEGO motor.
Download the Project Source Code and Required Utilities
Visit and review Software, Equipment and Tools for Building Robots for instructions to configure your robotics development environment. Use the links in that section to download all robotics project source code (including Robo-Tx firmware) and necessary libraries. Before uploading the Robo-Tx firmware to your Arduino Uno, confirm that SELECTED_PROFILE is set to PROFILE_ROBOT_MOTOR_SHIELD (separated by tab spacing only) in the file Settings.h. Study this profile to discover what else is supported in this configuration.
With the Python source code running, the IR remote control buttons are used to increase and decrease the motor speeds. The servo changes the position of the gear lever when the drive shaft RPM is within gear change thresholds. Adapt the source code as necessary for your type of IR remote control and refer to the troubleshooting guide if you encounter any problems.
Enhance the Project with Your Own Ideas
One way to enhance the automated gearbox project is to build a LEGO vehicle that is driven by it. To use an additional servo for vehicle steering will require a different Arduino configuration, such as a sensor board and Uno Motor Plus. In this configuration the SELECT_PROFILE must be set to PROFILE_UNO_MOTOR_PLUS in Setings.h of the Robot-Tx firmware project. A separate power source will be necessary for driving the servos.
Review the other Python robotics projects and refer to the Robo-Tx library help to learn more about reading sensors and controlling actuators. Use the comment section to share ideas or if you have any difficulty.